To layout a page you have several options:
- For a custom layout, with "AUTO DESIGN" OFF, on an empty page, when dragging a photo from the library, if you drop on an empty space, a new image group is created containing that image. If you drag an image from the library over an existing "image group", guides will show where you can place it inside that particular group.
- For a "quick and dirty" album design, with the "AUTO DESIGN" turned ON from the top right bar, on an empty page, as you drag and drop images from the library on the right, they are arranged based on the available templates (you can check them on the bottom) for the number of images that are on the page at the moment. If you don't like the template chosen, you can pick your own from the bottom bar.
For a custom/manual layout don't be afraid to use single image groups (one image per group), this way you can move each image around independent from other images.
Once you have created a page/layout that you like, you can save it as a template (top right button). The saved template will show on the bottom template bar too, for easy access. At any time you can use the bottom templates to change the layout to something else.
We recommend you spend a bit more time creating some original spreads, save them as templates and use them on later albums, maybe even creating your own signature layouts.
There are a few Keyboard Key/Mouse combinations that are very useful:
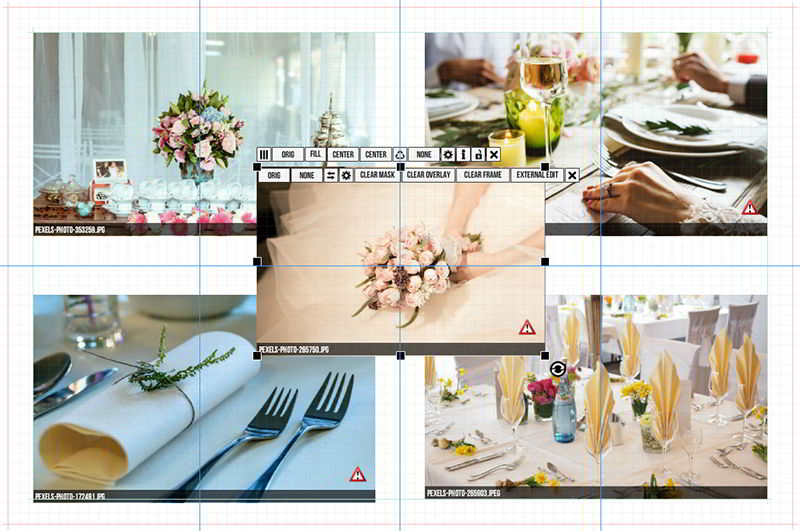
- Double click on an image/group to bring it to front for easy editing.
- Click on a photo and press <DEL> to delete the image from group. Press <CTRL> + <DEL> to delete the entire group.
- You can move and resize an "image group" using the squares from the corners/sides to position them on the page and set the dimensions.
- When you click and drag on a photo that's part of a group you set the visible/cropped part of the photo. But, if you press <CTRL> + drag the image, you will move the entire group arround.
- Pressing <ALT> key + dragging an image over another image will interchange them.
- Pressing <ALT> key + dragging an image from a group and DROPPPING on empty page space => removes the image from drag group and creates a NEW group containing just that image.
- Pressing <ALT> key + drag an image from group and DROPPPING on another group (over the guides that will appear showing where you can place it) => removes the image from drag group and adds it to the other group. This will also work if you drag from a group and place it somewhere else on the same group.
Using these tips and tricks I think you can move things around and create layouts pretty much in any way you like. We'll update this post as we add more combinations.